Saturday, November 30, 2019

Garnet Yam Casserole

3 large garnet yams
3 large red apples
3 or 4 large bananas
3 to 4 cups of orange juice
1 TBS ground cinnamon
3/4 cup of chopped pecans


Preheat the oven to 350 degrees.


Peel and slice the garnet yams. Steam (or microwave) them until tender but not overdone. Peel and slice the apples. Peel and slice the bananas.

In a large casserole dish, layer the yams, bananas and then the apples. Sprinkle generously with cinnamon and add if few dollops of butter if you like. The layering should include all the yams and fruit. The apples should be arranged on top in a decorative fashion. Add cinnamon and fill the casserole halfway with orange juice. Sprinkle with chopped pecans. Cover with a lid or tin foil and bake until hot and bubbly, approximately 45 minutes. Take the top off for the last 15 minutes to allow the apples to get a little crusty. Adding chopped pecans at this point will also make the top Crunchy.
This recipe can be easily adjusted to fit any size crowd. This will probably feed 8 to 10 at a Thanksgiving Dinner.

Friday, March 31, 2017

Blueberry Muffins - without rice flour


I might be a little obsessed with blueberry muffins, but they are an easy go to. I certainly add other fruits - apples, raisins, cherries, raspberries. But when I'm trying out a new flour blend, I stick with my favorite.

1/2 cup and 1/3 cup sorghum flour
1/2 cup and 1/3 cup gluten free oat flour
1/4 cup coconut flour
1/4 cup cornstarch
1/4 cup tapioca flour
1 Tablespoon baking powder
1/2 teaspoon salt
1/3 cup sugar
2 Tablespoons chia seeds (optional)
1/2 cup full fat yogurt
1/2 cup butter melted and cooled (1 stick)
3 large eggs
1 cup blueberries (or other fruit)

Blend the flours and dry ingredients together and then mix in the rest of the ingredients. I mix in the fruit last. Spoon into 12 paper lined muffin cups. Bake at 350 degrees for 20 minutes.

Friday, February 19, 2016

Bread Machine Gluten free Bread


I am always experimenting with ingredients and flours to find distinctive breads, and I recently was reconnected to my Breadman Ultimate Plus bread machine, so I've been making a new loaf every couple of days. 

This loaf came out with a flavor and texture half way between sandwich bread and zucchini bread.  Can't wait to try it with sunflower butter or in my French toast!

I have two basic flour mixes I work from, and for this I used my Quick breads one - 1:1:1 sorghum, rice, and tapioca.  In this batch I made a 50/50 white rice/brown rice mix for the rice portion.  Then I used a variation of my GF Sandwich bread recipe adapted for a bread machine.

Ingredients:
2 ½ cups flour mixture
2 teaspoon xanthan gum
1 teaspoon salt
1 Tablespoon yeast for bread machines
1 Tablespoon sugar
1/2 teaspoon ground sage
1 ½ cups Almond milk
1 teaspoon cider vinegar
3 eggs
1 ½ Tablespoon oil
 
Preparation:
Mix the first six ingredients together.  Bread machine yeast is recommended as a dry ingredient.  I don't use the paddle in my machine because it is a pain digging it out before the bread bakes, so its important to mix everything well before.

Add the vinegar to the milk and let sit a few minutes.  I did use the vanilla sweetened version here, and it turned out to be a great addition with this flour mix.  Then add oil and eggs, mix with whisk.  add this to the dry ingredients and mix thoroughly.  Scrape into bread pan in the machine.

I have been cooking it on the gluten free cycle, which include a  two stage mixing, about 20 minutes  to rise, and then a 52 minute baking time.  Dark crust setting, 1.5 lb. loaf.  Next time I am going to set it to bake only with a 30 minute delay start and then bake at least an hour.  The slightly denser dough doesn't get baked enough to suit me otherwise - but it's great as toast!

Saturday, August 09, 2014

Gluten Free Pineapple Zucchini Bread

Welcome to August's Zucchini Bounty
1/4 cup packed brown sugar
1/2 cup coconut sugar
1/2 cup sunflower oil (or softened ghee)
2 eggs (or 3 tsp egg replacer and 3 Tablespoons of water)
1 cup grated zucchini
1/2 cup grated carrot
1 8-oz. can of crushed pineapple with juice
1/2 cup water
2 cups gluten free flour mix
1 teaspoon xanthan gum
1 teaspoon baking soda
1 teaspoon ground cinnamon
1/4 teaspoon salt
1/4 teaspoon ground allspice
1 cup chopped walnuts or pecans (optional)

Heat oven to 350 degrees. Grease a ceramic bread pan and line with parchment and grease again. (See baking notes below for more information)

Mix the sugar, oil and eggs together until smooth. Add the zucchini, carrot, pineapple with juice, and water. Mix until incorporated.

Sift together the flour, xanthan gum, baking soda, cinnamon, salt and allspice. Blend well with the wet ingredients. Fold in the nuts if you are using them and spread evenly into the prepared pan.

Bake for 90 minutes or until a skewer inserted comes out clean. Cool 10 minutes and remove from pan. Serves about 10-12.

Baking notes: I use ceramic pans like a Emile Henri because it seems to allow a gluten free loaf more even baking - not burning the crust before the center is cooked. When I used to bake large wedding cakes, I found Magic Strips to be essential for keeping the baking even. Ceramic pans seem to do the same for the dense nature of gluten free breads. I also use Corning glass with great success. However, if you choose to use a metal pan, reduce the baking temperature by at least 25 degrees - go slow and observe what your oven does. Magic strips might also be useful in this circumstance. I find an oven thermometer to be an essential piece of equipment even if I trust the temperature of my oven. It simply confirms that the temperature that I expect the oven to be.

I should also note that I bake my bread using convection baking setting. My operator's manual suggests that I should reduce the normal baking temperature by 25 degrees when I use convection, but I haven't found this to be the case with gluten free breads.

Variations: This recipe can be made without the pineapple. If you opt to remove the pineapple and replace it with more veggie material - make sure to add a Tablespoon of vinegar to help the loaf rise and to neutralize/buffer the baking soda.

I love this loaf for using up zucchini in the garden, and can be made 100% zucchini or summer squash, no carrot. I've wanted to try shredded raw sweet potato as well. I'm sure raisins would be wonderful in this instead of nuts. Or with the nuts - which I think might be the recipe for one of my favorite little Saturday morning haunts who make an amazing "Morning Madness Muffin" that's delicious with a cup of earl grey tea. Yes, this would make great muffins, but I'm not sure how many muffin cups it would fill.

Sugar: This bread is on the sweet but not sticky sweet range of quick breads. I heavily reduce sugar when I can. Adjust for your personal taste. And if you don't have coconut sugar, substitute brown sugar.

Wednesday, April 02, 2014

Summer Squash Pickles


I love gardening, although my focus is generally on what is edible.  Flowers inspire me, but if it comes down to a space choice of flower or vegetable, veggie wins every time.  I continue to learn about new things to grow that I would never have considered edible, but I still fall back on certain staples every year.  And that means I always run out of season before I run out of tomatoes of course, and last year rather than too much zucchini, I ended up with too much summer squash.

Always on the search for canning recipes for these - I found two that were really successful and want to share them.  The first is Summer Squash Pickles, and the second is a variation on Green Tomato Relish AKA (Chow Chow).  Apparently, it depends on what region of the country you come from as to which name you use, but more on that later.  For now I'll share the squash recipe.

I found this recipe on a website called The Old Farmer's Almanac:

Yield 6 pints

Ingredients
10 c thinly sliced summer squash (any combination will do)
2 c thinly sliced onions (I used white & red, but again, any/or a combination will do)
2 c thinly sliced green pepper (I actually used green & banana)
1 large jar of diced pimento (optional)
2/3 c salt

Soak squash, onions, peppers in 2 quarts water for 2 hours.  Drain.  (I added ice cubes to mine)

Syrup
3c sugar
2 c apple cider vinegar
2 t celery seed
2 t mustard seed

Combine syrup ingredients and bring to a boil.  Drop drained vegetables and pimento into the syrup but don't cook.  Mix well.  Put in hot sterilized jars and cover with syrup.  Process in water bath for 15 minutes.

This is a wonderful pickle - crispy and lightly sweet with a spicy flavor.  The options of mixing the types of squash, onions, and peppers make it a great opportunity for cleaning up the garden and changing up the recipe!

Green Tomato Relish AKA Chow Chow


Last year was an exceptionally strange on for tomatoes.  There was lots and lots of fruit, and it all grew beautifully - it just wouldn't ripen.  The year before that I had been temporarily without a garden, and told a fellow gardener I would be willing to take his green tomatoes.  He remembered that, so at the end of the season last year I had two gardens' worth of green tomatoes.  I have some old stand-bys I use - I love green tomato mincemeat (See Sunday, November 16, 2008).  But I decided to try some new ones also.  A non-canning friend asked me to make Chow Chow, so I looked for recipes.  Apparently the term is more generic, from the South & Appalachia, and is another great way to use up extra veggies left over from a productive season.  I live in Missouri and the range of ethic influences on food and food prep - as well as their names - is really fun!  Amish, French, any variety of southern and soul food, German, and "just plain home Midwestern home cooking".

Here is the recipe I finally settled on (which was a GREAT hit with my friend!).  I don't know where I found it, the link did not carry thru when I printed it off the internet:

Yields 5 1/2 pints

Ingredients
12 - large green tomatoes, cored (about 20 small to medium size)
4 - green bell peppers, seeded
4 - medium or 1 extra large yellow onion (I used red and yellow)
1 - red bell pepper, seeded
1 -T + 2 t yellow mustard seed
1 - T celery seed
2 - c cider vinegar
2 - c granulated sugar
1 - T + 2 t kosher salt

Directions
Chop the tomatoes and peppers very finely.  I diced up all my veggies, I think this relish works better that way.  I had the time, you might not. So you could do small batches in a food processor.

Add the chopped vegetables in a large pot ( heavy bottom non reactive post), then add rest of the ingredients.  Stir well and bring to a simmer over a medium heat.  Cook stirring often and skimming as needed.  ( I did not have anything to skim.)

Simmer until the relish/chow chow cooks down and thickens into a relish, about 2 hours.  Turn into hot sterilized jars and process in a hot water bath.  The recipe didn't specify how long, I did 15 minutes.

As you can see, I made several batches :-)

Wednesday, March 26, 2014

Another Gluten Free Muffin Recipe


As I've posted before, I've been tinkering with a basic gluten flour mixture that I had used as a base for my Sandwich Bread.  And having success with both the bread and with pancakes made using it, I decided to try adapting a basic muffin recipe.  This one happens to be dairy free also.  The original recipe came from a 1992 version of the Betty Crocker's Cookbook, and I used the Popular Muffins version.  Below is the recipe as I modified it.  I did use olive oil this time, I was out of applesauce.

*GF Flour mixture:
3 cup brown rice
2 cup tapioca starch (you can use cornstarch)
1 cup glutinous rice
1 cup garfava flour
1 cup fava bean flour
1 cup masa harina

Muffin Ingredients:
1 egg
1 c vanilla almond milk
1/4 c oil
2 c GF flour mixture*
1/4 c sugar
1 T baking powder
1/2 t xanthan gum
1 t salt
1 c sprouts (this time I used fenugreek sprouts & a 1/4 t dill seeds. I'll leave the dill out next time!)

Heat oven to 400°.  The recipe calls for greasing bottom of muffin cups, I didn't have to.  I also used both a medium muffin pan as well as a muffin top pan.  I wanted them for breakfast egg sandwiches.  In both cases the muffins either fell out of the inverted pan or popped out with light pressure from a fork.

Beat egg; stir in milk and oil.  Add the dry ingredients and mix until completely moistened.  The original recipe says batter should be lumpy, but I never have good luck with a GF batter that isn't reasonably well blended.  (The lumps usually come from the starch not being fully blended.)  Then stir in sprouts. 

Fill muffin cups 2/3 full.  Bake 20-25 minutes or until golden brown.  As with most gluten free baked goods, remove immediately from the pan to cool.   The recipe says it yields 12 muffins.  I actually made a double batch, which gave me 12 regular muffins and 8 muffin top muffins.

I can hardly wait to try this with blueberries or the cranberry-orange version!  And sorry, no picture, I leave that to my gifted co-blogger!

Sunday, March 23, 2014

GF Sandwich Bread PS


An added plus is that the flour mix is a very good all-purpose GF flour.  I just tried as a flour for pancakes, and it performed very well!

Tomorrow, the ultimate test - biscuits!

Gluten Free Sandwich Bread Revisited


It’s been over three years since I first discovered the Gluten Free Sandwich Bread Recipe I shared (December 31, 2010), and as with any recipe over time, I’ve adjusted the basic ingredients and added some steps I use in the preparations.

I recently read  Grain Brain by David Perlmutter. He makes the point that many of the current gluten free recipes rely on starches – such as corn or tapioca – which have a high glycemic index and can contribute to type II diabetes.  That led me to start looking at alternatives that might be used in the mix to alleviate some of that impact.  By a happy accident (didn’t think that at the time though) I discovered glutinous rice flour has some interesting properties. Glutinous rice is a flour made from sticky rice.   Although it has roughly the same GI as cornstarch, it has some properties that add to the final bread texture.  Tapioca starch has a slightly lower GI. 

While making pancakes, I used glutinous rice in the batter, with the result of creating some of the best crepes I’ve ever made.  However, it will never work for pancakes.  By replacing the cornstarch – or some part of it – with the glutinous rice added a bit of that elastic property found in wheat gluten.  The resulting loaves are more flexible and hold up in sandwiches better.  No more crumbling onto the plate at that first bite!  I am varying the ingredients and ratios too.  My last batch of flour had a 2:1 of cornstarch and glutinous rice.  (My next batch I replaced the cornstarch with tapioca starch in the same ratio.  I'll let you know how that turned out!)
Another approach to expanding my food options is sprouting.  My first trial was with lentils.  I added the sprouts to the bread, and loved it!  It improved the texture again, added flavor, and increased the amount of protein.

Flour mixture:
3 cup brown rice
2 cup cornstarch
1 cup glutinous rice
1 cup garfava flour
1 cup fava bean flour
1 cup masa harina

Ingredients:
2 ½ cups flour mixture*
2 teaspoon xanthan gum
1 teaspoon salt
3 eggs
1 ½ Tablespoon oil
1 teaspoon cider vinegar
1 ½ cups warm water (not hot)
1 Tablespoon yeast
1 Tablespoon sugar

Preparation:
I’ve tried many treatments for the bread pan, as well as having changed types of pans and oven temperatures.  I find the only thing that works is parchment paper.  I cut it the length of the pan and leave enough to wrap up both sides of the pan.  I set the oven to 250° to allow the bread to rise where it’s really warm – my house is pretty drafty in that corner.

The original recipe suggested using three bowls – one for the dry ingredients, one for the water/yeast/sugar mixture, and one for the oil/eggs/vinegar mixture.  I still do that but with some added steps:
1. I take the eggs out beforehand and let them come to room temperature.  If in a rush, you can warm them up in water too.
2. I mx the yeast mixture first.  I make the water just a bit warmer than usual, then  add the sugar.  I had trouble with the yeast mixing into the water – it would clump up – so I use a fork to break it apart and dissolve into the water, as well as mix the sugar thoroughly.  I wait a few minutes and do the same thing, then leave it sit in a warm place for AT LEAST 5 minutes, sometimes more.  I wait until the top is completely covered with foam.
3. I measure the dry ingredients into a second bowl and then whisk well.
4. Using the third bowl I add the oil, then the eggs, and whisk together.  I hold the vinegar (cider really works better) until the yeast is ready.  When it is, I add the vinegar, whisk again, and pour the mixture into the dry ingredients.  Stir just a bit.
5. I then pour the yeast mixture into the egg bowl using a spatula to scrap the sides, getting all the sugar and yeast.  I use the same spatula stirring the yeast mixture and scraping the sides of the egg bowl, and then transfer all of it into the dry ingredient/egg mixture.  Scrape the sides well of the bowl.


6. I mix everything together with the whisk, wait a few minutes, and insert the parchment.  If you want to add anything extra – sprouts, spices, raisins, cranberries, caraway seeds – do it now. Whisk again, and then pour into the pan.  Level the surface and smooth into all the corners – the batter is usually about an inch below the top of the pan and a thick cake batter consistency.  Set in a warm place, cover if you wish, and let raise.  Usually takes about 40 minutes.  When the bread is about an inch over the top of the pan, it is done.  It will raise a bit more while baking.  Bake at 375° (350° if using Pyrex or glass pan) 50 – 60 minutes.  Remove from oven, loosen ends, and remove from pan.  Carefully tear off the parchment and let cool on one side and then the other.  It needs to be watched a bit to keep it from condensing moisture.

I usually can't resist and have to cut a slice off at this point, but don’t leave the bread on its bottom afterwards; it really needs to cool a good while before that.

HAPPY EATING!

Sunday, November 18, 2012

Rustic Pan Continental


I love quick breads when it comes to gluten free baking. Partially because I've had so much success with them. Today I made the Sandwich Bread recipe which is wonderful and has the traditional yeasty bread flavor to it. Problem was, I didn't put parchment on the bottom of the pan. Despite my best efforts, I tore the bottom off of my loaf. So I wasn't happy with taking a picture of it and the broken piece was the demise of the loaf. It was like a couple of drops of blood in shark infested water. I nibbled at the crunchy goodness of the crust, and before I knew it, half of the loaf was gone. Then my husband came in to find out what I was eating and he took a couple of thick slices with butter and strawberry jam. Oh, bliss. But so much for having some bread for the week. And I was out of the rice flour so I started to dream up a new idea. What can I do with that teff I have hanging around?
Grains from Asia (buckwheat), Africa (teff) and South America (quinoa)
The flavor reminds me of pumpernickel.


Porridge:
1/2 cup whole grain teff
3/4 cup apple juice (unfiltered)
3/4 cup boiling hot water

Dry Ingredients:
1/2 cup quinoa flour
1/2 cup buckwheat flour
2 Tablespoons tapioca flour
2 teaspoons xanthan gum
2 Tablespoons ground flax meal
1 teaspoon baking soda
2 teaspoons baking powder (use a GF brand)
1/2 teaspoon salt

Wet Ingredients:

2 eggs
1/4 cup light oil like olive oil
1 Tablespoon vinegar
1/2 cup apple juice (unfiltered)

Extras:
1 teaspoon caraway seeds, slightly crushed (optional)
1/2 teaspoon powdered cumin seed (optional)
1/4 cup sunflower seeds (with additional to sprinkle on the top)

First start with the porridge.  Using a heavy bottomed pot (iron pan in my case) brown the teff so that it is popping and you can smell a nice toasty aroma from it. While stirring pour the boiling hot water into the toasted teff being careful not to let it splash you.  Keep stirring to keep the lumps out. Now add the apple juice and continue to cook until it is a nice thick porridge. Set aside.

Sift together the dry ingredients. Whisk together the wet ingredients in a separate bowl. Preheat the oven to 375 degrees. When the oven is preheated, mix half the porridge and wet ingredients into the dry ingredients. Add the extra spices and sunflower seeds if you wish now. Now add the remaining wet ingredients and porridge. Mix until evenly combined. Do not worry if the mixture looks "too wet for bread" Pour into a heavy loaf pan that has been well greased and add parchment if you are concerned the loaf may not lift out of your baking dish easily. I prefer Pyrex or a ceramic loaf pan like Emile Henry. Smooth the top. Sprinkle on more sunflower seeds if you wish. Bake for 50-60 minutes. Turn out of the pan and allow to cool.


Tuesday, August 28, 2012

Mokelumne Granola Bars

I made this using a recipe idea from Alter Eco Foods. I decided to name the recipe after the great camping trip I took to the Mokelumne Wilderness with a fun group of people. Photo pending.

3 cups regular Gluten Free oats (not the quick cooking kind)
½ cup uncooked quinoa (I like red quinoa, but the color won't make a difference)
½ cup chia seeds
1/3 cup flax seeds ground
4 Tablespoons maca powder
1 ½ cup dried fruit (I used a mix of diced dates, golden and black raisins)
3/4 cup sunflower seeds - roasted and lightly salted
2 teaspoons cinnamon
1 teaspoon sea salt
 ¼ cup coconut oil (warmed until it is liquid)
½ cup honey

First toast the oats and seeds. I start with the chia seeds and dry roast them in a heavy pan (iron skillet) until they start to pop and smell toasty. Then I do the same with the 3 cups of oats, toasting half the amount at a time. This can also be done in a 350 degree oven with a cookie sheet, but be sure to keep an eye on it and stir regularly. Then I will dry roast the flax seed powder, and once it is hot and just beginning to color, I add the maca powder. Now maca may clump when it roasts so once it's out of the pan I might have to run it through a seive. Also it toasts very quickly and that's why I add it to the flax so it's less likely to burn. Add the fruit, sunflower seeds, cinnamon and sea salt and blend to combine. First drizzle the coconut oil into the mix and then the honey. The honey should be just enough to loosely clump together. Other sugary syrups could be used instead of honey, such as brown rice syrup, golden syrup, or agave nectar. If you don't wish to use coconut oil, I would suggest ghee.

Preheat the oven to 350 degrees F. Line a 9x13-inch pan with parchment and grease the sides and parchment. This will help lift the bars from the pan, so over running 2 edges will help as handles. Pour in the granola mixture and press down using slightly wet hands (so honey won't stick). Bake for 20 minutes. Allow to cool for about 10 minutes before lifting from pan. Cool another 5 minutes and cut into bars. Note: the bars can be crumbly so when you cut them apart, make them no less than 1.5 inches in width. Store in an airtight container.

Awesome Gluten Free Banana Bread


The biggest problem I've had with this bread is that it disappears so fast that I don't have time to get a picture of it.

3 mashed very ripe bananas (roughly 1 cup)
2 large  eggs
1/4 cup light oil, coconut oil or ghee
3/4 cup lightly packed brown sugar
1/2 cup  sorghum flour
1/2 cup tapioca starch
1/2 cup either quinoa (lighter texture) teff (nutty flavor) or more sorghum (very moist consistency) flour
2 tablespoon ground flax seed
2 teaspoons baking powder (make sure brand is GF)
3/4 teaspoon xanthan gum
1/2 teaspoon baking soda
1/2 teaspoon salt
2 teaspoon ground cinnamon
1 cup walnut pieces(optional)

Preheat the oven to 350ºF. Grease a 9-inch ceramic or glass loaf pan. Sometimes lining with parchment will help lift the bread out of the pan. I cannot say enough about using a heavier pan so the batter bakes more evenly. And I don't usually use the parchment, just make sure it is greased well.

In a mixing bowl, beat the mashed bananas with the eggs, oil and brown sugar till combined. Add the sorghum, tapioca starch, the other flour (quinoa, teff, or more sorghum) ground flax seed, GF baking powder, xanthan gum, baking soda, salt, and cinnamon and beat until a smooth sticky batter forms. Stir in the walnut pieces by hand.

Scoop the batter into the loaf pan and spread evenly. Stud the top with some extra walnut pieces, if desired. Bake on the center rack for 55 to 65 minutes, if necessary, until the center is done (a wooden cake tester should emerge clean). Ovens vary, so check the loaf at 50 minutes.
Cool on a wire rack. 

I've made this bread for non GF people and they also love it. I've also played around with the flours, baking different loaves and lining them up next to each other. So far the favorite in these taste trials has been the quinoa version. Just using sorghum and tapioca makes a very moist, sort of gummy loaf. The quinoa adds a sort of malty flavor and makes it less gummy. The teff is a nice variation and seems to add a nutty note. Just some observations. I don't think I would increase the tapioca beyond 1/2 cup.

Saturday, June 04, 2011

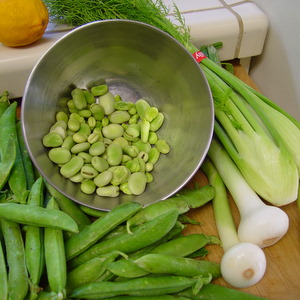
Risotto with Fresh Fava Beans, Onions, and Fennel


1 lb fresh fava beans shelled
1 cup chopped onion
3 tablespoons olive oil
2 fresh "baby" fennel bulbs trimmed, and diced (reserve frilly tops)
1 teaspoon fennel seeds coarsely ground with a spice grinder
4 cups canned low-salt broth more or less (can be vegetable broth or chicken)
4 tablespoon chopped fresh fennel tops
1/2 cup chopped pancetta (optional)
Salt to taste
Freshly-ground black pepper to taste
lemon juice to taste

1.Cook fava beans in boiling salted water 2 minutes. Drain, cool and peel outer skins.

2. Heat oil in heavy large skillet over medium-high heat. Add onion and fennel bulb; saute 2 minutes. Add fennel seeds; saute 3 minutes. Add risotto. Stir in 1 cup of broth. As broth evaporates continue to pour broth in small amounts, letting the risotto absorb the liquid each time and stirring so it doesn't stick to the bottom of the pot. The process should take about 20 minutes to incorporate all 4 cups of broth. Just as the last cup of broth is being added stir in the fava beans. Continue to cook the risotto until all broth is absorbed.

3. Stir in pancetta (if used) and fennel tops. Take off the heat and cover. Allow to sit for about 2 minutes.

4. Mix in lemon juice and season to taste with salt and pepper. Serve warm or at room temperature.

Friday, December 31, 2010

Gluten Free Sandwich Bread Recipe

I got this from http://www.glutenfreecookingschool.com/, and using her table modified the GF flour to adjust for my allergies to soy and corn in addition to the gluten. It was great! And really simple. Since I am visiting family with my bread machine packed away I chose the convential oven method.

The original recipe calls for:

Gluten Free All Purpose Flour Mix
3 parts
brown rice flour (I use Bob’s Red Mill)
3 parts corn starch
2 parts soy flour
1 part masa harina

Her suggestions:

The masa harina in the flour mix for this recipe is usually available in the Hispanic sections of most grocery stores. Due to the way it is processed, masa harina is very absorbent and you cannot substitute corn meal or corn flour. You can purchase masa harina on Amazon.com if it is not available locally.
If you are allergic to corn then you can make the following substitutions in the flour mix: use tapioca starch instead of corn starch and almond flour instead of masa harina.
If you are allergic to soy, then you can substitute any of the following flours for the soy flour in the flour mix: sorghum flour, garfava flour, or quinoa flour.
If you are on a dairy-free diet, then you may use soy milk or rice milk. Just make sure that they are gluten free.If you are allergic to eggs, use the flax substitute listed in the recipe, or follow the instructions on your favorite egg replacement powder. When I use the flax eggs, the bread is usually slightly wetter than otherwise.
Always substituting, I used the following GF mixture:

Gluten Free All Purpose Flour Mix
3 parts
white rice flour (I also use Bob’s Red Mill)
3 parts tapioca starch
2 parts garbanzo flour
1 part almond flour


Really Good Gluten Free Sandwich Bread1 Tbsp. bread machine yeast
1 Tbsp. sugar
1 ½ c. water (105 degrees or a little less than hot)
2 ½ cups of my gluten free flour mix
2 tsp. xanthan gum
1tsp. salt
3 eggs (or 9 Tbsp. water and 3 Tbsp. ground flax seed)
1 ½ Tbsp. oil
1 tsp. cider vinegar

1. Start by combining the yeast and sugar in a small bowl (I use the smallest in my set of three nested mixing bowls). Add the water while gently stirring the yeast and sugar. Let this mixture sit while you mix the rest of the ingredients – bubbles and foam should form if the yeast is happy.
2. Combine the flour mix, xanthan gum and salt in the largest mixing bowl and stir well.
3. In a third bowl, whisk the eggs, oil and vinegar until the eggs are a bit frothy.
4. By this point the yeast mixture should be foamy, so you can pour the two liquid mixtures into the flour mixture. Blend the dough with a mixer for 4 minutes.

Bread Machine Directions:Scoop your dough into the bread machine and smooth the top of the dough. I bake my bread using an 80 minute setting that allows for 20 minutes of kneading, 18 minutes of rise, and 42 minutes of baking. However, since I don’t use the paddle in by bread machine, I’m effectively doing a 38 minute rise and a 42 minute bake. (The advantage of not using the paddle is that you don’t end up with a hole in the bottom of your bread.)
Conventional Oven Directions:Scoop the dough into a greased loaf pan. Allow the dough to rise in a warm area until is is about 1 inch from the top of the pan. Then bake at 375 degrees for 50 – 60 minutes.

The bread browned quickly, and the crust was quite dark when done, but REALLY good!
Plan on making more at first, the magic that makes fresh cooked bread disappear works the same for this as any gluten bread!

Sunday, December 07, 2008

Gingery Rhubarb and Butternut Squash Bake


Posted by Picasa
It was Thanksgiving and I wanted a side dish that was similar to baked yams, but not so sweet. I was also wanting to use some things that I was growing in the garden, especially the rhubarb which I had in abundance. This turned out sweet enough, and very different in taste. I liked it just as well the next morning added to my hot cereal.

1 Kabocha or butternut squash, peeled and sliced the size of apple slices that you'd put in pie
1 cup rhubarb, diced
1 small can crushed pineapple, with juice
1 tablespoon finely diced fresh ginger
2 tablespoons butter or margarine
1 cup chopped pecans
2 tablespoon demerarra sugar (or brown sugar will do)

Preheat the oven to 375 degrees. Lightly oil a lidded baking dish (cover in tin foil if you don't have a lid). Layer the squash, rhubarb, pineapple and ginger into the dish, or toss the ingredients in a separate bowl and then ladle into the dish, trying to arrange the squash slices so they are flat. Pour in the pineapple juice (if it wasn't added earlier) and dot with butter. Cover dish and bake for 1 hour until the squash is fork tender.

Toss together the pecans and demarrar sugar. Remove lid and sprinkle nut mixture evenly over the top. Bake another 20 minutes until the nuts are turning golden brown. Serves 6.

Wednesday, November 26, 2008

Nut Pie


This is a Caramelized Nut Tart recipe adapted from Bon Appétit magazine, December 1998 issue. I've been wanting pecan pie and this seemed like I could adapt it into a nice pie without the eggs or dairy ingredients. It was very popular, winning over the bakery made Pecan Pie that was brought to our Thanksgiving celebration. Homemade wins again.

Filling Ingredients:

1 1/4 cups sugar
1/4 cup water
2/3 cup coconut milk
1 teaspoons shortening (margarine or butter but I used Jungle Shortening)
1 tablespoon honey
1 teaspoon vanilla extract
1 teaspoon cinnamon
1 cup walnuts, coarsely chopped
1/2 cup pecans, coarsely chopped
1/2 cup slivered blanched almonds

1 recipe of Gluten Free Pie Crust

9 1/2 inch tart pan with removable bottom or rather shallow 9-inch pie plate

Method

Preheat oven to 375°F. Roll dough out on floured surface to 12-inch round. Transfer dough to 9 1/2-inch-diameter tart pan with removable bottom. Fold overhang in and press, forming high-standing thick sides. Pierce dough all over with fork.

Bake crust until set but still pale in color, about 12-15 minutes. Transfer to rack; cool.


Combine sugar and 1/4 cup water in heavy medium saucepan. Stir over medium-low heat until sugar dissolves. Increase heat. Boil without stirring until caramel is deep amber color, occasionally brushing down sides of pan with wet pastry brush and swirling pan, about 10 minutes. Reduce heat to medium. Be careful not to burn the sugar.


Gradually whisk in coconut milk (mixture will bubble). Stir until caramel is smooth. Add shortening (or butter), honey, cinnamon and vanilla. Stir until well blended. Mix in all nuts. (Apologies for the blurry pictures - it was late at night).


Pour caramel mixture into crust. Place the pie on a larger baking sheet to stabilize and to catch any overflow. Bake until entire filling bubbles, about 20 minutes. Cool completely on rack before serving.

Coconut Bliss was too rich for this pie. Turns out Rice Dream tasted better with it. This was really very rich, only to be consumed in moderation. I would recommend cutting it into 8 or 12 slices.

Also, I've been thinking what a nice bar cookie this would make. I'd add a couple of more tablespoons of sugar to the GF pie crust, roll it into a 9x13 pan. Then I'd make the carmel but only used sliced almonds. I'd spread the almonds over the prebaked crust, and bake. Then I'd slice them into diamond shapes, just like at the coffee shop. If I try it, I'll add pictures.


Posted by Picasa

Tuesday, November 18, 2008

Gluten Free Pie Crust


6 oz. Bob's Red Mill Gluten Free All Purpose Baking Flour
2 tsp. Xanthum gum
2 oz. shortening (Spectrum Organic Coconut Oil)
2 oz. lard*
1 tsp. salt
1 Tbs. granulated sugar
2 Tbs. cold water
1 approximate teaspoon unfiltered apple vinegar with the rest of Tbs. cold water

*4 oz. of shortening seems to work just fine, instead of a ½ and ½ mix.

Weigh the flour, shortening and lard into a bowl on a kitchen scale. Add the other ingredients except for the water and vinegar.

Cut the shortening and lard together with the flour, xanthum gum, sugar and salt until it is like coarse meal. Chill in the refrigerator for 1 hour.

Add the 2 Tbs. of water. Measure an approximate 1 teaspoon of vinegar in the Tbs. measure and fill the rest with cold water. Once all 3 Tbs of the water/vinegar is added, knead until the dough holds together. Sprinkle in more water if the mix is dry. Sprinkle the rolling surface with GF flour and roll out to desired shape. This transfers to the pan more easily if you wrap the dough around the rolling pin. Crimp or decorate and fill. Makes a single crust.


Posted by Picasa


Just a few thoughts
I added the sugar to make the crust brown. Don't know if this is really necessary, or if it worked. I opted to use lard and the coconut oil as I wanted to see how it tasted. The little "rag cookies" (pie dough left over from shaping the crust, sprinkled with cinnamon sugar and baked for 8-10 minutes) were very light and crumbly. If you can use butter, I'd probably recommend fats that are something closer to my original pie crust (not GF).


Rather nice with a glass of rice milk, but maybe next time I'll try less lard. (Later note: replacing the lard with coconut shortening worked just fine. I'll leave it up to the cook.) The shape held better than I expected. I was ready to fix a bunch of tears but only had one. Also, I'm guessing about the xanthum gum, seemed like the right amount to condition the dough and I am regularly using vinegar as a dough conditioner. I used this for an experimental pumpkin pie. The filling needs some adjustments, but the crust was delightful. Even my husband liked it.

Sunday, November 16, 2008

Green Tomato Mincemeat


9 cups finely chopped green tomatoes (leave the skins on)
4 cups peeled, chopped tart apples (used 4 Granny Smith)
3 cups raisins
½ cup diced candied citron, lemon or orange peel
2 teaspoons ground cinnamon
¼ teaspoon ground allspice
¼ teaspoon ground cloves
1 teaspoons salt
1 ½ cups brown sugar, firmly packed
1 ½ cups white sugar
2 Tablespoons Lyle's Black Treacle
¾ cup unfiltered apple vinegar
¼ cup lemon juice


Preparation:
Combine all ingredients in a large heavy pan. Cook mixture slowly until it is tender and thick, about 1 hour or more. Stir frequently to prevent sticking.

To can, pour boiling mixture into hot, sterile jars, leaving ½-inch headspace; seal promptly. Process in a boiling water bath for 20 minutes. Store in a cool dry place.

To freeze, pack cold mincemeat into freezer jars or containers, leaving about an inch headspace for expansion. Seal or freeze promptly.

Makes about 6 pints of green tomato mincemeat.

Monday, September 29, 2008

Trial and Error with the Soyabella

I admire all the bloggers who have success after success in the kitchen with gluten free cooking. For me, it's turning out to be much more of a learning curve. I can attest by this last picture of my favorite waffle iron.


I had mixed up a batch of GF waffles, straight from a purchased mix. And it solidly glued my favorite waffle iron together. I broke the handle trying to pry it open, and the rice flour simply won't come off of the griddle. Oh well. I've been reading that you shouldn't use a pan or waffle iron that's been used with gluten products because of gluten cross contamination. But I was sad to see my 15 year old waffle iron go. I still could have used it to make waffles for my husband.

Instead of buying a new waffle iron, I bought an Aroma fuzzy logic rice cooker. I use it regularly and I really love it. And it was only $40. My favorite function is the delayed cooking option. I can set it so the rice is hot and fresh just as I wake up in the morning. Really nice.

Something nice in my tea still alludes me. Now I don't "have to have" my morning cuppa in order to be sociable. But there's something civilized in my mind about a cup of black tea with milk that I can't shake. I like milk (but that's out of the question) and I even like soy milk (but that's also out of the question). I've finally settled for rice milk. But sometimes it leaves an oily slick on the top of the tea. Ick. I've been racking my brain about making rice milk myself, but have balked at all the processing it takes. And then I thought I'd found a machine to answer all my prayers.

I purchased a Soyabella on Friday. I was very excited about the product as the lady in the shop assured me that it made rice milk and nut milk with great ease. I certainly won't be making soy milk with it. I looked Soyabella up on the web and was impressed by all the praises for the machine. So I went back at my earliest convenience and bought it. Sunday I actually got to use it for the first time. But I would say the jury is still out on this one.

My first batch of "rice milk" came out unfavorably. Now, I'm pretty used to having a learning curve on something new - so when I poured out the end product that looked like curdled milk, I chalked up my disappointment to "learning curve". Now granted, there are no instructions in the booklet about rice milk. Only "rice porridge". Ah, now looking at the mess I realized that I had made a version of congee, and a not too appetizing one at that. I can say this with confidence as I had just had breakfast of a delicious homemade congee (made in the rice cooker overnight) with mustard greens and pickled turnips. I strained the "rice milk" through a gold mesh coffee filter and put the thicker rice bi-product aside. I flavored the "rice milk" with some agave syrup and vanilla and moved it to the fridge with the hopes that I would like it better when cold. Frankly it is stodgy and gelatinous and I could never imagine putting it in my tea.


I rinsed off the unit and put the soaked adzuki beans in the "soy milk" basket. It was then that I noticed the remarkable difference in the hole sizes of the "rice porridge" basket from the "soy milk" basket. Hmmm. Now I'll have to try the rice in the "milk" basket next. Again I fired up the Soyabella according to the instructions. This time, a gelatinous beany goo issued forth, a strange purple grey color and none too appealing. Ok. Why do lovely little red beans transform into purple grey? Another mystery. I flavored that with a little maple syrup, but it really didn't appeal much to me at all. Into the fridge to cool down and see if there was some magical transformation. Alas, none transpired. Well, I'd read a couple of experiments with adzuki bean milk that had also ended in disappointment, so I will add to the list.

However, in trying to decide if I should chuck it down the sink, I opted to use it in my pancakes this morning. And what I will say for adzuki bean milk is that it improved the texture of my usual pancakes.

Usually there is a graininess to rice flour pancakes. I miss the somewhat chewy tooth of a wheat flour pancake. This morning, they were nearly indistinguishable from my old pancake recipe. Not to mention, the other minor gripe I have with GF pancakes is that they never brown quite like regular ones.


Maybe I just had a good pancake karma fairy this morning, or I've learned a little on getting them to color up, but they really had a nice golden color when they flipped over. So while I may not drink adzuki bean milk in my tea or pour it over my Rice Chex, I might be using it in some baked goods to see if it continues to add some magic.

GF Adzuki Bean Milk Pancakes

1/2 cup Arrowhead Mills GF pancake and baking mix
1 tsp ener-g egg replacer
2 tsp olive oil
2 tsp blue agave syrup
1/2 cup adzuki bean milk (enough to make it the correct consistency for pancakes, pourable but not that thin up to 3/4 cup)

Fry on a hot greased griddle, flipping only once.

Makes five 3-inch pancakes

Wonder if there are any strawberries in the garden?

Wednesday, August 20, 2008

Blueberry Corn Muffins

The corn bread recipe makes a really good blueberry muffin with a couple of quick adjustments. Use the basic recipe and because I like these sweet, I add 1/3 cup more sugar to them. But it's only a suggestion. Just at the end of mixing the batter I add 1 cup of fresh (washed and cleaned) blueberries. I add 5 to 10 minutes on the baking time.

These have passed the "average eater" test. Nobody would have guessed they're gluten free. In fact, I brought them along to a lunch I was invited to. The hostess had encouraged people to bring something to share and I felt it would get me past the awkward "no bread for me, thanks anyway" thing. Everyone tucked in to the blueberry muffins with great delight. I find that grad students usually have no time to cook. However I noticed one person at lunch was politely avoiding the muffins. I casually mentioned that these were egg, dairy and gluten free. Her eyes lit up; "Really? You bake gluten free? I've been GF for two years now and I don't know anyone who bakes like this."

I have a friend who went to Culinary school. She said she didn't want to be rich like Bill Gates, but wanted to make people happy one cookie at a time.

I know what she means.